[SOLVED] How to Fix Destiny 2 Crashing in 2025
If you are looking for fixes for Destiny 2 Crashing then this article is for you. There is nothing more worrisome to a gamer than a game that isn’t working. If you have put a lot of effort into playing it in the past and now if it isn’t working the way it should, it is mood-ruining. One such cool game that has a crashing problem is Destiny 2.
Everything that you should know about Destiny 2′s crashing issue is given below. If you are one of the gamers out there who recently came across this issue and don’t know how to fix it, then don’t worry here are some methods through which you can completely fix it without any problem.
Why Destiny 2 Crash On PC?
The major reason identified for the ‘Destiny 2 Crashing’ issue is missing DLL or corrupted system files. Other activities that can cause this issue are an active Windows firewall, insufficient memory, memory overclocking, and overlay programs like the Nvidia GeForce suite.
It is also seen that when too many applications are kept open in the background, they occupy the graphics card space and the graphics card will not be able to play graphic-intensive games such as Destiny 2.
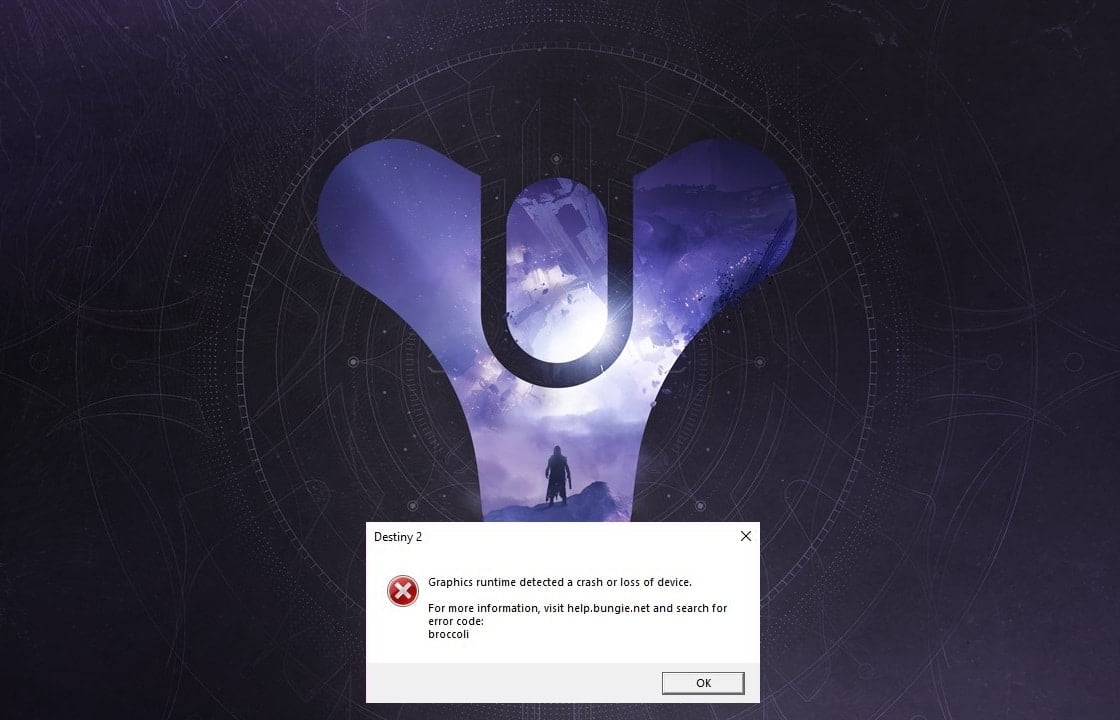
How to Fix Destiny 2 Crashing on PC?
Fixing Destiny 2 Crashing PC Error is not that hard and can be easily fixed. There are a few steps mentioned below that can help you get rid of this problem, feel free to use any as they are all tried and tested.
| How to Fix Destiny 2 Crash |
|---|
| Fix 1: Run the Game As Administrator |
| Fix 2: Clear Cache |
| Fix 3: Clean Boot |
| Fix 4: Set Game to Priority |
| Fix 5: Update Drivers |
| Fix 6: Game Updates |
| Fix 7: Disable CPU/GPU Overclocking |
| Fix 8: Shift DLL Files |
| Fix 9: Check RAM Usage |
Also Read: Destiny 2 Ascendant Challenge This Week
Run the Game As an Administrator
Try fixing the issue by running the game with Administrator privileges. Follow the given steps in order to run Destiny 2 as an administrator:
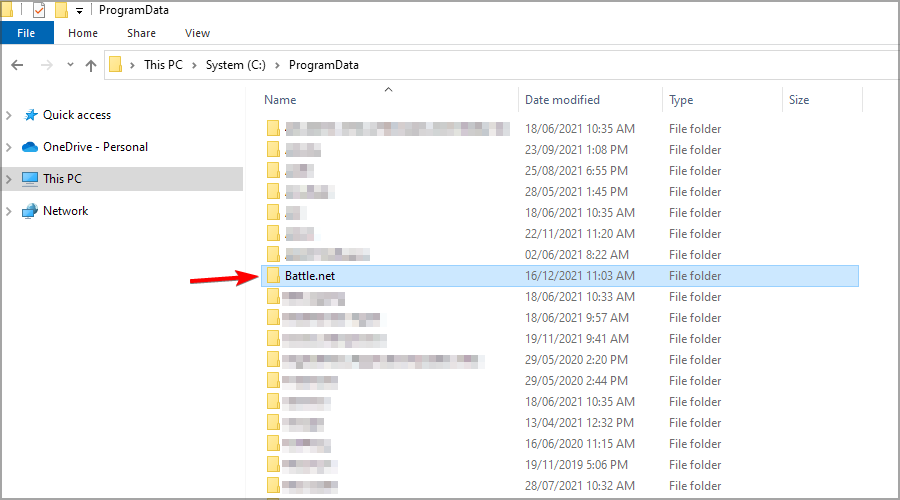
- Step 1: Right-click on the Battle.net launcher file and from the menu choose “Run as an Administrator”.
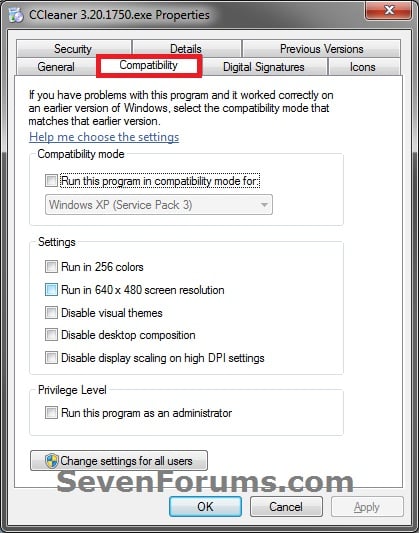
- Step 2: Now go to properties and then move to the Compatibility Tab.
- Step 3: Now, tick the “Run this program as an administrator” checkbox. Save the changes and you can perform the same steps for Battle.net and Steam too.
Related: Destiny 2 Technocrat Empire Hunt in 2025 [Complete Guide]
Clear Cache
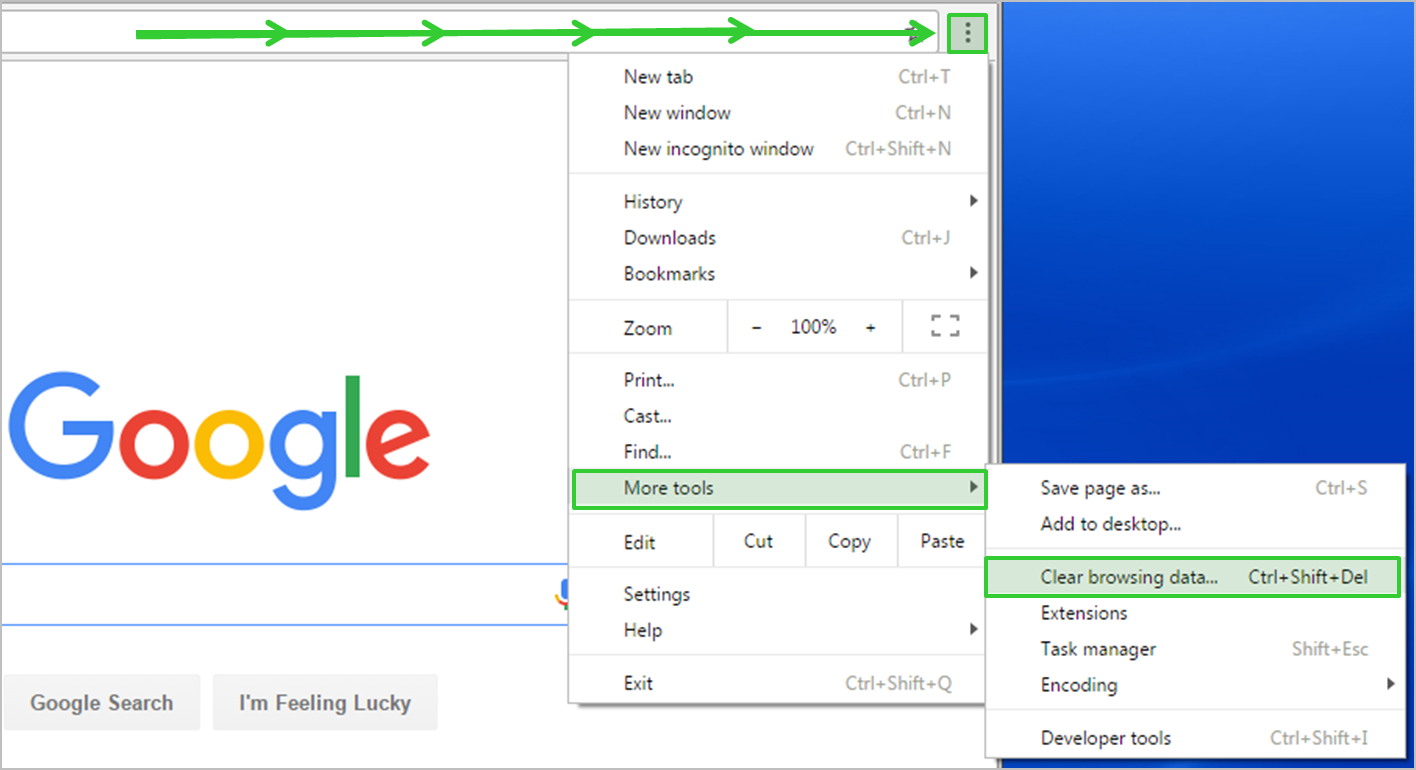
- To clear the cache in Chrome, press [Ctrl], [Shift], and [Del], all at once.
![press [Ctrl], [Shift], and [Del] press [Ctrl], [Shift], and [Del]](https://blog.omggamer.com/wp-content/uploads/2025/10/Press-Ctrl-Shift-and-Del-scaled-1-1439x1080.jpeg)
- Next, select “Clear Browser cache”. Here you can select any period that suits you from the list. If you want to delete all cache data, you can select “All”.
- Next, check the box in front of “Images and Files in Cache” and submit your selection by clicking the “Delete Browser data” button. Now you are all done and you can reload the website to see if the issue exists.
Clean Boot
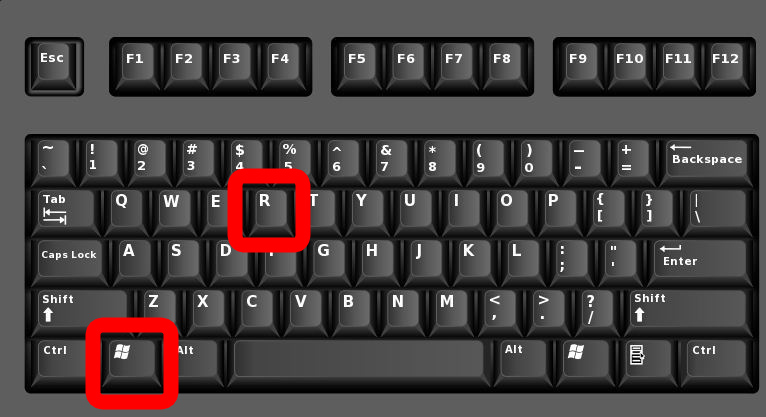
- To perform a clean boot on your Windows 11 system, press the Windows Button + R Key, and the Run Dialogue Box will appear in front of you.
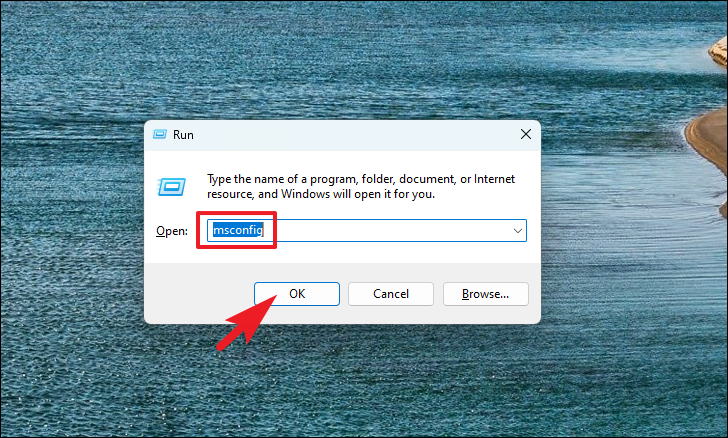
- Now type “msconfig”, press Enter and the System Configuration window will open.
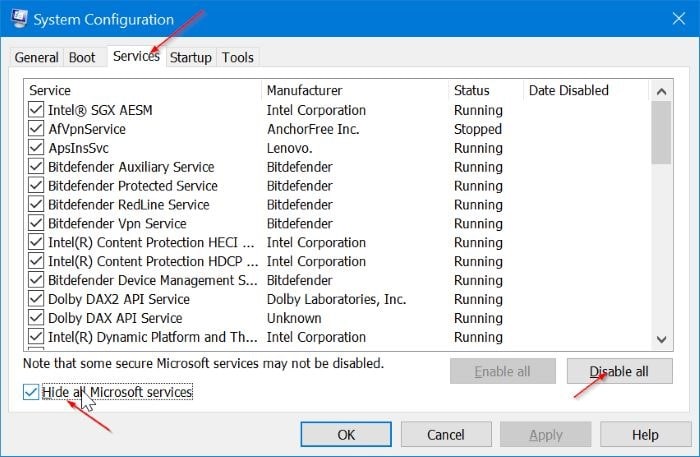
- Here, select the Services tab and uncheck all the unnecessary services. Check only those services that you need now and click OK.
Must Read: Destiny 2 The Mountaintop Quest
Set the Game to Priority
- To put the game on the priority list, right-click on the Taskbar, and from the given list choose Task Manager.
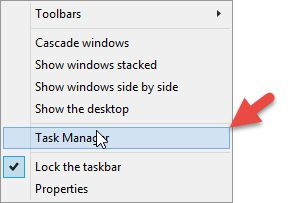
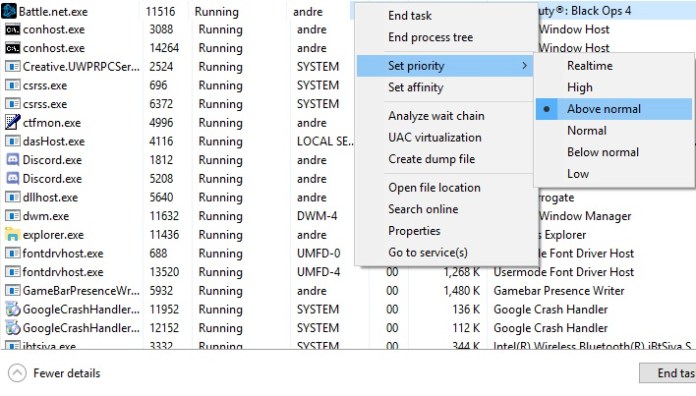
- Next, under the Process tab, locate the battle.net launcher. Here, to set it as a priority, right-click on it and go to Details.
- Again, right-click on battle.net and set the Priority as High. Finally, save changes and run the game.
Update Drivers
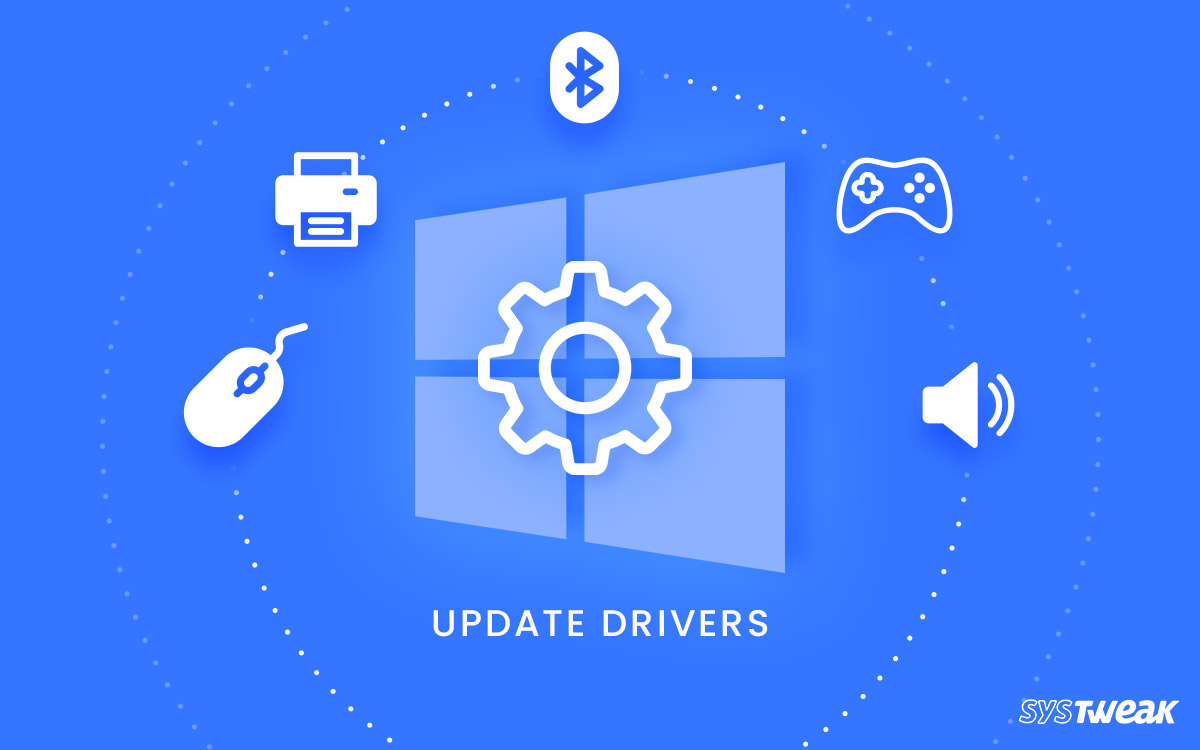
Outdated drivers on your current Windows version November fail to support Destiny 2. To get these drivers updated, you can first click on the Windows icon and then click on the Settings icon. Here, a new window will pop up and you have to select Windows Update from the left menu. Now click on Check for updates on the new window that pops up. If there is any update pending, it will start updating the PC.
Also Read: Destiny 2 Toland Location This Week
Game Updates
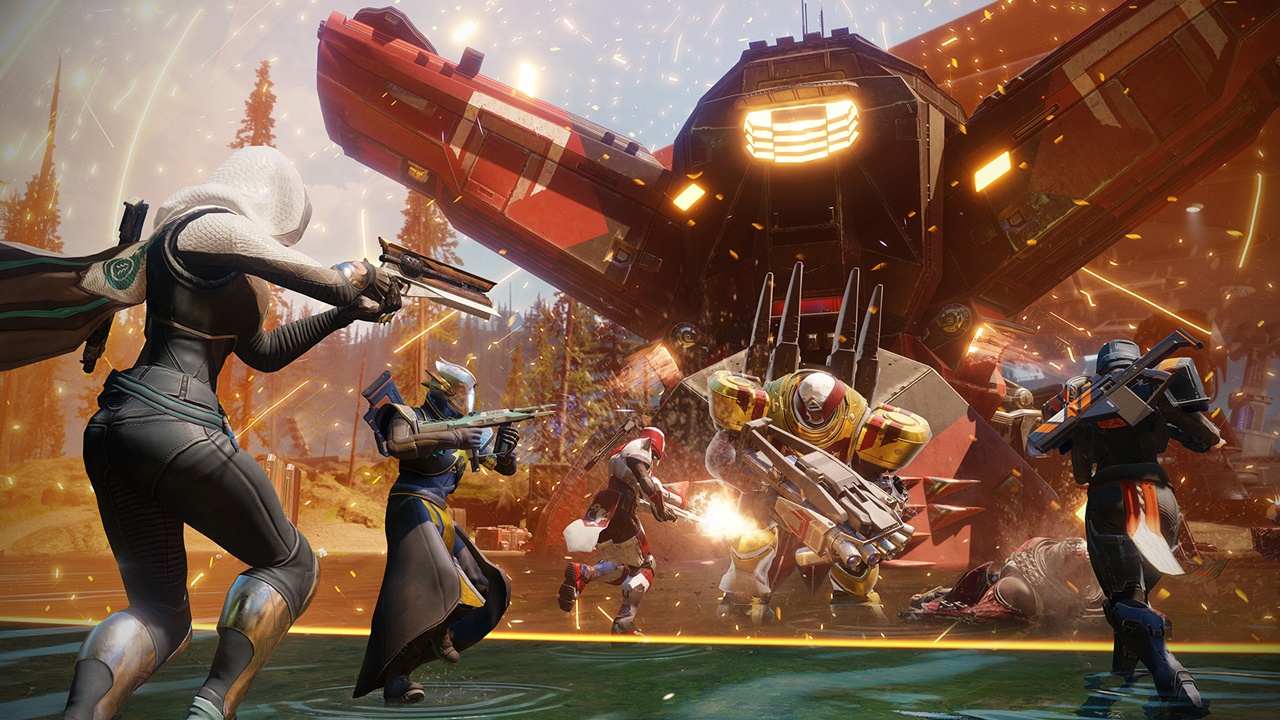
There is also a possibility that the game Destiny 2 might have some of its game updates pending. In this case, check inside the game if there are any updates that you haven’t done. If so, update the game and see if you have resolved the error.
Disable CPU/GPU Overclocking
The latest gaming machines give users an advantage to overclock the frequencies of their system processors. Most of the time it works and they do boost performance and gaming experience. But not all the games support this overclocking scenario, so check if Destiny 2 supports overclocking or not. If the answer is “No” then use the option “Disable CPU/GPU Overclocking”.
Shift DLL Files
The file GFSDK_Aftermath_lib.dl of Destiny 2 has to be kept in a certain directory to fix this crash issue. For that, you have to go to the Start Menu and click on My Computer. Next, head to the location (C: Program Files/Destiny 2). Once you reach the location, look for GFSDK_Aftermath_lib.dll, now copy the DLL file, and paste it to the location (Destiny 2binx64).
Check RAM Usage
If you are playing intensive games or working on software that consumes a lot of RAM while using that particular application, try clearing them as soon as you are done using them because if you keep them running in the background, they will use a lot of RAM and if you go forward to play another high-intensity game like Destiny 2, your game November crash frequently.
These were the fixes for the Destiny 2 Crashing problem that you can try out if you face such an issue. for more such information you can visit our site omggamer.com where we upload news and the latest information on gaming.


![Mortal Kombat 12 Release Date, Trailer & Rumors [2025] 1 Mortal Kombat 12 Release Date, Trailer, Rumors & More](https://blog.omggamer.com/wp-content/uploads/2025/10/Mortal-Kombat-12-Release-Date-Trailer-Rumors-More.jpg)
![11 Best Games Like Cyberpunk 2077 [Ultimate List] 2025 2 Games Like Cyberpunk 2077](https://blog.omggamer.com/wp-content/uploads/2025/10/Games-Like-Cyberpunk-2077-1.jpg)
![GTA 6: 7 Mostly Asked Questions by Gamers [2025] 5 GTA 6_ Mostly Asked Questions by Gamers](https://blog.omggamer.com/wp-content/uploads/2025/10/GTA-6_-Mostly-Asked-Questions-by-Gamers.jpg)
![Destiny 2 Challenges List | How to Win D2 Challenges [2025] 6 Destiny 2 Challenges List](https://blog.omggamer.com/wp-content/uploads/2025/10/Destiny-2-Challenges-List.jpeg)


